


How to run the Microsoft Azure AD Verifiable Credentials sample app
- John Craddock

- Mar 2, 2022
- 13 min read
Updated: Mar 4, 2022
Part 3 in the series
In my first blog in the series, I introduced you to Verifiable Credentials (VCs) and Decentralized Identifiers (DIDs). In the second blog, I took a look under the hood and showed you how VCs were issued and verified. In this blog, I want to show you how to issue your own VCs using the Microsoft Azure AD Verifiable Credentials (VCs) service. To do this, we will use the Microsoft sample app, which is available on GitHub and the Request service API. In the next blog, I will show you how to issue different types of VCs
By the end of this blog, you will understand how VCs are issued and verified. Please make sure you are familiar with the first two blogs before proceeding.
Microsoft has provided a tutorial which you can find here https://docs.microsoft.com/en-GB/azure/active-directory/verifiable-credentials/. This blog is based on the tutorial but will take a slightly different approach to set up the environment. I have added additional background details, which I hope you find useful.
The Microsoft example app is published on GitHub and available as .NET, Java, Node or Python code. I will show you how to use the Node.js version. I am pitching this blog at IT Pros and assuming that the reader is a competent IT admin but knows nothing about Node.js or building the development environment. I will not teach you Node.js, but in the next blog, I will show you how to modify the code samples to understand better what's going on under the hood.
I assume you have a reasonable understanding of OpenID Connect and ID Tokens. If you need help with these topics, watch my webinar on "Federated Identity Authentication and Authorization with OpenID Connect and OAuth2.0" https://learn.xtseminars.co.uk/video/watch or better still come on my identity masterclass https://learn.xtseminars.co.uk/. It would be great to meet you.
Preparing your environment
I recommend creating a Windows 10 or 11 VM to host your development environment. This will provide you with a sandbox environment for installing all the tools and development code. The Microsoft documentation for the tutorial is a little sparse when setting up the environment, especially if you are new to GitHub and Node.js. So let me help you. When installing the required apps, choose all the default settings unless otherwise specified below.
Download and install Visual Studio Code from here:
Download and install GIT from here:
Download and install (see next paragraph) Node.js from here:
Although not required to run the example code, some node package manager (npm) modules may require Python and the Visual Studio Build Tools. During the Node JS installation, you can choose to install these tools along with Chocolatey. For the blog, I decided not to install the Chocolatey option.
After installing the tools, sign out and sign in to set the appropriate paths variables.
Node.js runs JavaScript on the computing platform and has excellent performance. It is a hot choice for web development as the same programming language is used inside the browser and on the server.
Git is an open-source version control system. Files can be committed to a repository (storage) and then managed, including rolling back changes to a particular version and cloning. The repository could be local or remote. GitHub is a very popular remote repository where anyone can sign-up and host a public or private repository for free. GitHub is extensively used to make open-source projects publicly available. GitHub makes money through hosting, paid for, full-featured private repositories.
Open a command prompt, and you can check the versions of the installed components using
node -v
My version 16.13.2
git –version
There is a double-dash before version
My version 2.35.1.windows.2
Now we have the tools to download the code sample, build the code (automatically installing the necessary modules), and run the code.
The code executes locally on your Windows 10/11 VM. The Microsoft Request service API connects directly to the app via a callback; consequently, the app must be available via a public HTTPS URL. The Microsoft sample recommends using Ngrok as a reverse proxy to provide a public URL.
Download the Ngrok Zip from here:
Extract it to a suitable location. I placed it here: C:\ngrok
I am going to create a directory structure for running the sample code as follows:
C:\VC-APIs\version0
C:\VC-APIs\version1
Open a command prompt and switch to the version0 directory, and clone the code from GitHub using:
Examine the cloned code, and you will see an active-directory-verifiable-credentials-node folder and below that a folder called 1-node-api-idtokenhint. The code sample is run from this folder.
We'll leave version0 as a clean copy if we want to refer back to anything once we make changes. Copy the active-directory-verifiable-credentials folder to the version1 folder.
In the command prompt window, switch to the version1\....\1-node-api-idtokenhint folder and run:
npm install
Node Package Manager (NPM) builds the project, integrating external modules, including the Verifiable Credentials SDK. When you run npm install, all the packages and their dependencies are added to the node_modules folder. The modules that a project depends on are defined in package.json.
While the environment is being built, you may see some warning messages. To get more details and fix the problem use:
Node audit
Node audit fix --force
Now we can run the app. To simplify examining the code and executing the app, let's do this from within VS Code. Open VS Code and using File | open Folder, open the version1\....\1-node-api-idtokenhint folder:
C:\VC-APIs\version1\active-directory-verifiable-credentials-node\1-node-api-idtokenhint
From the menu bar, use Terminal | New Terminal to open a terminal window. In the terminal window, run the app using:
node ./app.js
We could have built the module in the terminal.
If prompted by Defender to allow firewall access for Node.js, you do not need to enable it.
You will notice in the VS Code console window it reports: "Example issuer app listening on port 8080!". The example app has created a website and is listening on port 8080. If you want to see it running, you can browse to http://localhost:8080
The website must be available via a public URL, and for this, we use Ngrok. Open a new command prompt. Switch to the c:\ngrok directory and execute.
ngrok http 8080
You will see something similar to this:

The public URLs for http and https are shown along with the mappings to local host. Previously you could run Ngrok, as an unregistered user. This is no longer possible and if you attempt to connect to https://b283-86-9-24-8.ngrok.io/ you will see the following message:
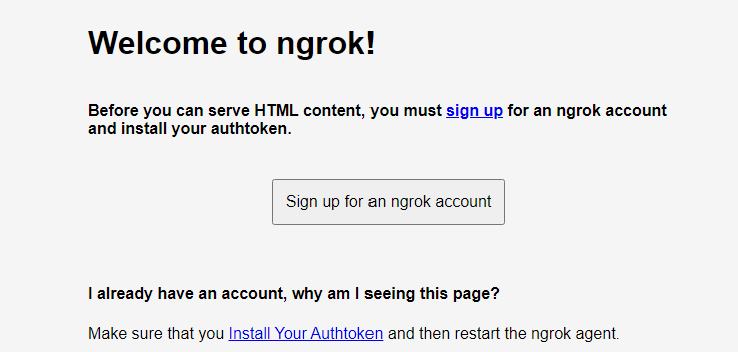
You need to sign up for account. Once you have an account, login to the dashboard https://dashboard.ngrok.com/get-started/setup and under Getting Started | Setup & Installation you will see the command for adding your authtoken to the local ngrok.yml configuration file. It will look like this:
ngrok authtoken 1oc5NT1Q69iAapvQlQeDSEdKHjE_jLkS72NbHgu44EnHRUY7
Start ngrok again: ngrok http 8080
Use your browser (not your mobile) to connect to the HTTPS endpoint.
You will see:

The app is running, but the application would fail if you attempted to get a credential. We will have to configure the necessary Azure Services and the app to get this working.
Azure configuration includes:
A service principal to represent the Request Service REST API
A Key Vault
Stores the keys used by the Azure AD Verifiable Credential service
Private Container storage for the VC definition files
Display and rules files
Public container storage for icons displayed on the VC cards in Authenticator
Required for the next blog
Azure AD Verifiable Credential service
A domain to be linked to the DID generated by the service
Once the Azure components are in place, you must configure the sample application. The sample application is started by running app.js. Clicking the Get Credential button executes issuer.js, and clicking the Verify Credential button executes verifier.js. The sample app issues and verifies a VC of type "VerifiedCredentialExpert". For this VC, the claims are asserted by the issuer app. The user is required to enter a PIN to receive the VC.
Required
Azure AD tenant with a P2 license
Currently, you need a P2 licence to use the Verifiable Credential service. Expect this requirement to change soon
Azure AD subscription to create a resource group, key vault and storage accounts
An Azure AD global administrator with permissions to create and manage the Azure resources
A website in your domain to publish the DNS binding.
Configuring the Azure AD services
Once fully configured, your environment will look like this:

The Microsoft documentation for configuring the components is here. https://docs.microsoft.com/en-us/azure/active-directory/verifiable-credentials/verifiable-credentials-configure-tenant
You can create the key vault and storage in advance or create them while configuring the VC service. The Microsoft tutorial provisions them in advance. In this blog, I will show you how to create the key vault and storage during the configuration of the VC service.
Creating a service principal
Currently, the Request Service API is not visible in your tenant. However, we need to give the API access to the key vault to sign issuance and presentation requests. We also need to grant consent for the sample app to use the API. To configure the API in our tenant, we need to create a service principal with the API service's app ID (bbb94529-53a3-4be5-a069-7eaf2712b826). The Microsoft tutorial uses the cross-platform Az PowerShell module. It is recommended to run this with PowerShell 7.0.6 LTS-x64, PowerShell 7.1.3-x64, or later. A recent update to the az.resources module broke the code for creating a service principal. You need the 5.3.1 version. You can check the module you have installed with get-module az.resources.
Rather than installing the module, I created the service principal using the AzureAD PowerShell module:
New-AzureADServicePrincipal -AppId "bbb94529-53a3-4be5-a069-7eaf2712b826" -DisplayName "Verifiable Credential Request Service“
If you want to use the Az module, look at the documentation. Alternatively, you could use the Azure CloudShell, which is already configured with Powershell 7 and the Az module. The current az.resources version (5.3.0) doesn’t work (March 02), hopefully it will be updated soon.

Setting up the Verifiable Credentials service
Until February 15th 2022, the service was only available in the Azure North America region. Consequently, it made sense to host the Azure key vault and storage in this region. Now, if you have a European tenant the Verifiable Credential data and processing is located in the Azure European region. If you had a Verifiable Credentials service configured prior to February 15th and your tenant is hosted in Europe you need to opt-out of the service and reconfigure it prior to March 31 2022. See https://docs.microsoft.com/en-us/azure/active-directory/verifiable-credentials/whats-new?#azure-ad-verifiable-credentials-available-in-europe
Check your tenant properties to find out where it is located.

The February update introduced support for the W3C Status List 2021 and an issuer identity hub. This allows the verifier to check the status of a credential using a privacy-respecting mechanism. Probably the subject of a future blog, but we will just update the VC rules file for now. Open VerifiedCredentialExpertRules.json which is located here:
C:\VC-APIs\version1\active-directory-verifiable-credentials-node\1-node-api-idtokenhint\CredentialFiles.

After the entry for validityInterval add "credentialStatusConfiguration": "anonymous". Add a comma to the end of the line and save the file. Your rules file should now look like this:
We are now ready to configure the service.
Signed in as a GA in your test tenant, go to Azure AD | Security | Verifiable Credentials…
In the Getting Started screen, enter your organization name and the domain you will use. To create the DNS binding for your DID, you must publish a json document available by a public URL. For example: https://masterclass.xtshub.com /.well-known/did-configuration.json
Click on Select key vault, and you can select an existing key vault or create one. Click Create new key vault and set the following values, leaving all others at their default.
Create a new resource group; I called mine VCresouces
Name your key vault; I called mine vcsigning
Region set to a US location or a European location if your tenant is in Europe
Click Review + create and then Create. After the key vault is created, click Select, and you will see that your new key vault has been added to the VC Getting started screen:

Click Save and create credential. After the service is configured, the Create a credential screen will open. Click Discard and then Organization settings. You will see:

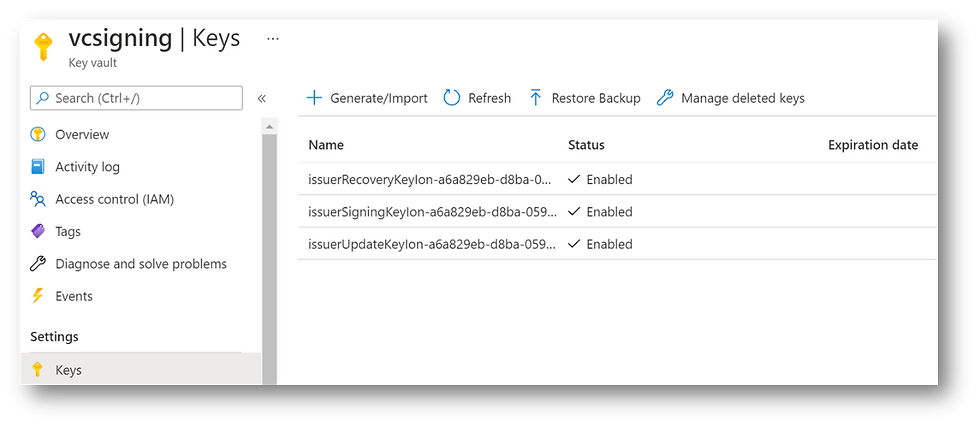
In the organization settings, you can see the DID created for the service along with three keys held in the key vault. Record the DID value for later.
The Verifiable Credential service stores its public and private keys in a key vault. The Verifiable Credential service and the service principal representing the request service API must have access to the keys. The issuance and presentation requests are signed using the private key.
The administrator who created the key vault will have owner access. They must also be granted "Sign" permission. This permission is required to enable the administrator to sign the DNS binding document.
To complete the configuration of the key vault, in the Microsoft Azure search, enter key vault and select your key vault. If you click on Keys, you will see the three keys.
Click on access policies, and you will see that there are two policies, one for the Verifiable Credentials issuer service and one for your global administrator. The access policy for the service was automatically added during the configuration.
The access policy for the administrator must be updated. Click on the Key Permissions dropdown, and under Cryptographic operations, add Sign.
You need to add an access policy for the request service API (represented by the Verifiable Credential Request Service SP). Click Add Access Policy and set:
The key permissions to Get and Sign
The service principal to Verifiable Credential Request Service
Click Add to add the policy and then Save. Access to the Key vault is now as shown below. The Secrets Get permission for the Azure AD VC services is not currently used.

Setting up Azure storage
Our next job is to set up a storage account and a container to hold the display and rules files. Once again, we will do this via the configuration for the VC service.
Open the Verifiable Credentials screen and select credentials. Click Add a credential to create a credential for the sample app. Set the credential name to "VerifiedCredentialExpert" (don't include the quotes).
Click on select a display file, and you will be asked to select a storage account. To create a new account, Click + Storage account. Set the following values, leaving all others at their default
Set the name; I called mine credentialfiles
Location set to a US location or a European location if your tenant is in Europe
Select the resource group you created earlier (VCresouces)
Click OK to create the storage account. The next job is to create two containers. One for the display and rules files and the other to hold images for the VC cards displayed in the Authenticator.
Select your new storage account and click + Container, and set the name; I called mine vcfiles. Leave the access level as private (no anonymous access).
Create another container called images and set the access level to Blob (anonymous read access for blobs only). This container will not be used when running the current app. We will use it in the next blog when creating our own VC cards.
You will see the two containers you created:

Select the vcfiles container and upload the display and rules files from the sample app. You will find them here (make sure you updated the rules file as specified earlier and you saved it):
C:\VC-APIs\version1\active-directory-verifiable-credentials-node\1-node-api-idtokenhint\CredentialFiles
With the VerifiedCredentialExpertDisplay.json file selected, click Select. In the create a new credential screen, click Select rules file and select the rules file from the container. You are now ready to create the credential. Click create, and the creation will fail.

Although the Verifiable Credential Issuer Service was assigned the appropriate role when you configured the storage, this was not done for your administrator.
Search for Storage accounts, select your storage account and then Containers. Select the vcfile container and AccessControl (IAM). Click on Role assignments, and you will see that your administrator has the Owner role and the Verifiable Credential Issuer Service, the Storage Blob Data reader role.
Your administrator must also have the Storage Blob Data reader role to create a credential. Click +Add | Add role assignment. From the list of roles, select Storage Blob Data reader, click Next and assign the role to your administrator.

Back on the create a credential screen, set the name to "VerifiedCredentialExpert", and choose the appropriate files from storage. This time it should complete successfully, and the overview for the credential is displayed. If you click on the Issue Credential URL, you will see the manifest (contract) for the credential. If you want to view a pretty version of the JSON, add JSONView as a browser extension. Record the URL for later.
Registering the App in Azure AD
To call the Request Service API requires an OAuth 2.0 access_token. The app uses MSAL and client credential flow to obtain the token. The app must be registered in Azure AD and granted permission to the Request Service API
In the portal, go to Azure AD | App registrations and click New registration. Set the name to MS-VC-Sample and leave all the other settings at their defaults. Click Register.
Select API permissions | + Add a Permission | APIs my organization uses. Search for Verifiable Credential Request Service; this is the service principal you added earlier. Add the VerifiableCredential.Create.All permission. Grant Admin consent for the permissions:

If you are unfamiliar with registering apps, access_tokens, OAuth2.0, setting permissions and consents, please join me for one of my masterclasses. https://learn.xtseminars.co.uk
Select Certificates and secrets | Client secrets and add a New client secret. Set the description to vc-signing and click Add. Record the value for later. If you don't copy it now and close the page, you have lost your chance and will have to create a new secret.
That's it for the Azure AD Configuration. Keep the portal open as you now need to configure the app using information from the portal.
Configuring the app
In Visual Studio Code open the C:\VC-APIs\version1\active-directory-verifiable-credentials-node\1-node-api-idtokenhint folder.
Open the config.json file.

Update the file taking the settings from the Azure AD Portal.
In App registrations, select MS-VC-Sample and update the azTenantId (Directory (tenant) ID)) and azClientId (Application (client) ID) from the overview page.
Using the values you recorded early, update the secret, manifest URL, and DIDs. For the sample app the issuer and verifier DIDs are the same. On completion, your file will look something like this:

Service Location
If the service is hosted in the US, the endpoint for the Client request service API is at
https://beta.did.msidentity.com/v1.0/{tenantID}/verifiablecredentials/request
If your service is hosted in Europe, the endpoint must be changed to
https://beta.eu.did.msidentity.com/v1.0/{tenantID}/verifiablecredentials/request
This needs to be set in issuer.js and verifier.js. The sample app is configured for the US.
For Europe, open issuer.js and search for "beta.did" add the missing eu. Repeat this for verifier.js
Running the App
Before we run the app we need to make a couple of changes. The VC that the app issues and verifies is one where the app is responsible for asserting the claim values. The user has to enter a PIN in the Authenticator to receive the VC. There are many scenarios where this could be used. For instance, you may have gone to an organization to prove your identity and take with you various documents. After carrying out the appropriate validation, the organization creates a unique VC for you and provides you with a PIN to add the VC to your wallet.
For convenience, the PIN is displayed on the website in the sample app. Obviously, the PIN should be held secretly and issued to the user using an appropriate secure method in a real scenario.
As you will know from my last blog, the issuance and validation requests picked up by the Authenticator are constructed by a call to the Request Service REST API.
The API request for issuance is constructed using data from the app's issuance_request_config.json file, and for validation, the presentation_request_config.json file is used.

If you look in the issuance_request_config.json you will see the claims that are set for the VC.
You can either change the values here or set them at runtime by the code that runs from issuer.js Open issuer.js and locate the following two lines:
issuanceConfig.issuance.claims.displayName = "Forrest Gump";
issuanceConfig.issuance.claims.sponsorName = "Lieutenant Dan";
I am deliberately not using line numbers as the code you have downloaded could be different to mine.
Change displayName to given_name and sponsorName to family_name. Set the values appropriately.
My updated code looks like this:
issuanceConfig.issuance.claims.given_name = "James";
issuanceConfig.issuance.claims.family_name = "Bond";
Now we are ready to run the app. If necessary, refer back to the beginning of this blog to see how to run ngrok and the app.js.
Once the app is running and you click on get credential, you should see a QR code with a PIN below it. Scan the QR code, and you will see an error message that the app or website may be risky. Click advanced and proceed anyways. Enter the PIN and add the credential. Now try verifying the VC, and once again, you will get the error message that the site may be risky.
It's a good start; we can now issue and verify a VC. However, we need to create and publish the DNS binding document to eliminate the risky site message. In the Azure portal, go to Verifiable credential | Organization setting and click Verify this domain. Download the document and publish it at
https://yourdomain/.well-known/did-configuration.json
Congratulations, you can now issue and verify the VC without any error messages.
Nearly the end…
If you have got this far, well done. It has been a long blog. However, you are now in a position to issue and verify your own VC. In the next blog, I will explain the rule and display definition files and how you can modify the application to issue and verify different types of credentials.
Please let your friends and colleagues know about the blog via LinkedIn and Twitter, don't forget to include me, so I see it! @john_craddock www.linkedin.com/in/johnxts
My next identity masterclasses are coming soon, and it would be great to meet with you for a week of identity geekery! Full details at https://learn.xtseminars.com


Which agency provides the best service in Escort service Haridwar? If you do not know, you can get quality service with the help of our website callgirlharidwar. It is completely trusted and safe. The girls here are capable of satisfying you in every way.
Haridwar Escort , Rishikesh Escort Service , Chandigarh Escort Service , Manali Escort , Haridwar Escorts, Chandigarh Escorts, Haridwar Escort Service , Escorts Haridwar , Rishikesh Escort Service
Hello friends, I have brought a lot of entertainment for you. Are you in India, and want the company of someone in India who can meet you, drink with you, and fill you with romance? I provide you dating service in every big city of India online. You can also enjoy our free dating service. I am sharing some links with you, which are available in your city. Check Now
Escort Service In Delhi // Bangalore escorts // Goa Escorts // Delhi Escorts // Escort in Delhi // Mumbai Escorts// Call Girls In Dehradun // Nagpur Call Girl // Dwarka Escorts // Mussoorie Escort Service // Surat Escorts // Escort Service In Shimla // Chandigarh escorts /// Ahemdabad escort Service // Call Girls In Jammu // Russian Call Girls In Goa // Call Girls In Bangalore //
You may view historical sights and marvels from the Mughal era on our Delhi Darshan Bus Tour, which takes you on an emotional trip across the city and New Delhi. Admire famous sites including Mahatma Gandhi, Rajghat, India Gate, and Jama Masjid. Take a rickshaw ride or visit Chandni Chowk for a more authentic experience.
I recently came across this amazing blog, and I must say it’s full of insightful and engaging content that keeps readers hooked. The way it covers topics with depth and clarity makes it a go-to place for anyone who loves quality reading. I truly appreciate the effort behind such valuable posts, and it inspires me to keep learning and exploring more. For those who are interested in real estate updates and expert insights, don’t forget to check out my platform Top Real Estate Home, where we share the latest trends, tips, and property guides. A good blog is always worth celebrating, and this one definitely deserves it!
This blog is full of amazing insights and valuable information. I truly enjoyed reading it and gained a lot of knowledge. For anyone who loves exploring travel ideas and tips, I highly recommend checking out travelsswiftly.com for exciting travel inspirations.