


Issuing and presenting Verifiable Credentials with the Microsoft Azure AD services
- John Craddock

- Mar 2, 2022
- 10 min read
Updated: Mar 4, 2022
Part 2 in the series
In my first blog in the series, I introduced you to Verifiable Credentials (VCs) and Decentralized Identifiers (DIDs). The Microsoft Authenticator is the wallet that will receive, hold and present verifiable credentials. In this blog, I want to examine the components of the Microsoft solution and show you the interaction between the issuer, holder and verifier.
I have based this blog on the Microsoft sample application. I have updated the app to issue an Alumni VC based on an id_token. In my next blog, you will learn how to get the sample app running, and the subsequent blog will show you how to issue VCs using claims from different sources.
By the end of this blog, you will understand how VCs are issued and verified. Please make sure you are familiar with the first blog before proceeding.
Issuing a VC

As shown in the above diagram, the process starts with the issuer app specifying the type of VC to issue to the holder (Authenticator). The Authenticator then requests details of the VC type from the Azure AD service. The service returns a manifest that specifies how to display the VC card in the Authenticator and rules that identify the source of the claim values.
There are various methods for specifying claim values. These include values that are:
Statically defined in the VC manifest
Asserted by an Idp via an OpenID Connect id_token
Requires the user to sign in to the Idp
Asserted by the user filling in values in the Authenticator
Asserted by the issuer App
The user is asked to enter a PIN to obtain the VC
Asserted by one or more existing VCs in the holder's possession
Once the claim values have been obtained, the Authenticator supplies the claims values and requests the issuance of the VC.
On your mobile device, if necessary, download and install the Microsoft Authenticator app for Android or iOS
The following steps will tell you all you need to know to add and manage a VC in your user agent (wallet).

If this is the first time you have added a VC, you will need to click Add account | Other account… you can then scan the QR code. The QR Code informs the Authenticator where it can retrieve the issuance request. Remember, the request defines the VC type that is required; lots more detail soon. As an alternative to using a QR Code, if the website is accessed directly from a mobile browser, a deep-link triggers the Authenticator and the issuance request retrieval.

The first time you add a VC, you will see the Get started option and a link to the Azure Preview Terms. Once you click Get started, you will see the card for the requested credential. The actions the user performs to obtain the VC will depend on how the claims for the VC are derived. In this instance, you sign in to an IdP, and the claims are obtained from the returned OpenID Connect id_token.
The VC type is specified in the issuance request. The requester has a digital identity and has signed the issuance request using their private key. The issuer's DID is contained in the request, and the associated public key, contained in the DID document, is used to verify the signature. Hopefully, you have read the introduction to this series of blogs and will remember that a DID can be verified as belonging to an organization via a DNS binding. The Authenticator has checked the signature and the DNS binding and has added the "Verified" icon for masterclass.xtshub.com.

Once you have signed in and the id_token returned, you are prompted to add the credential. Click Add, and the Authenticator sends the id_token (containing the claims) and other data to the Azure AD VC service and requests the VC to be issued. The VC is returned and displayed in the wallet.
Notice in step 9 two new icons are showing at the bottom right-hand side. The round icon starts the QR code scanner for VC issuance and verification requests. The Credentials icon switches from the other Authenticator functions and allows you to view your VCs.

Once you have a VC, click on the card for more details. Click on the three vertical dots to deactivate, activate or delete a card. You cannot use a deactivated card.
Going deep
I promised you some more details, so here we go!
When you run the Microsoft sample app (app.js), it runs on Node.js with Express. Express is a framework that simplifies the creation of web applications. Our website is listening on port 8080, and we are making it available via a public URL via Ngrok (more details in the next blog).
Connect to the website, and you will see the option to get or verify a credential:
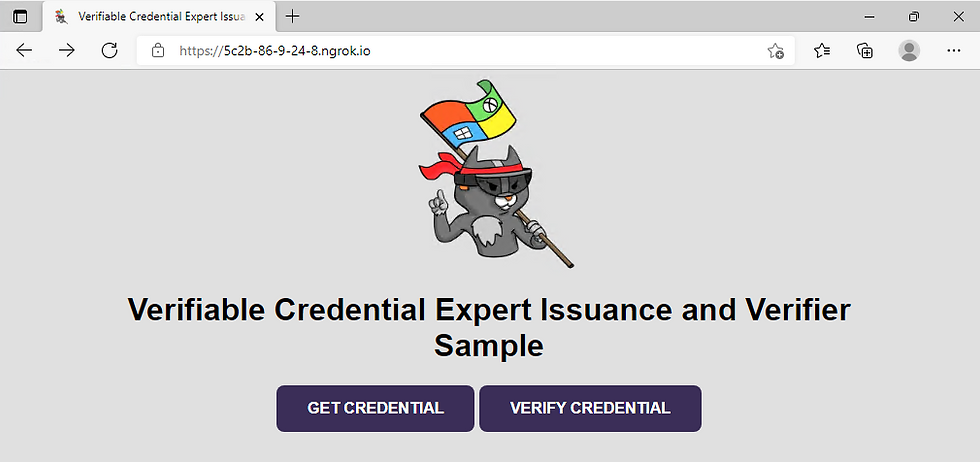
Click on the Get credential button, and JavaScript running in the browser sends a request to the server (hosting the website) to build an issuance request.
The request is built based on a credential type and manifest. Previously the app had to do all the heavyweight crypto maths to construct and sign the issuance request.

Microsoft depreciated the requirement for the app to build the issuance request by providing the Request Service REST API to construct both issuance and presentation requests. The app calls the API to create the request, and the API replies with a link or a QR code. In the Microsoft sample app, the API only returns a link. The QR code is created using javascript running in the browser. Previously the Authenticator would retrieve the issuance request from the application. The Authenticator now retrieves the request directly from the Microsoft service using the API. The Authenticator also reports the successful acceptance of a VC to the Microsoft service. The Microsoft service reports status to the app using a callback. Status includes QR Code scanned and VC successfully issued.
A callback is effectively an API that the app implements. The app requires a public URL to make the callback endpoint accessible by the service.

As I have already discussed, the VC manifest defines details of how the VC card should be displayed in the Authenticator, the required claims, and the source of the claims. Below is the manifest for the sample app I am using for this blog:
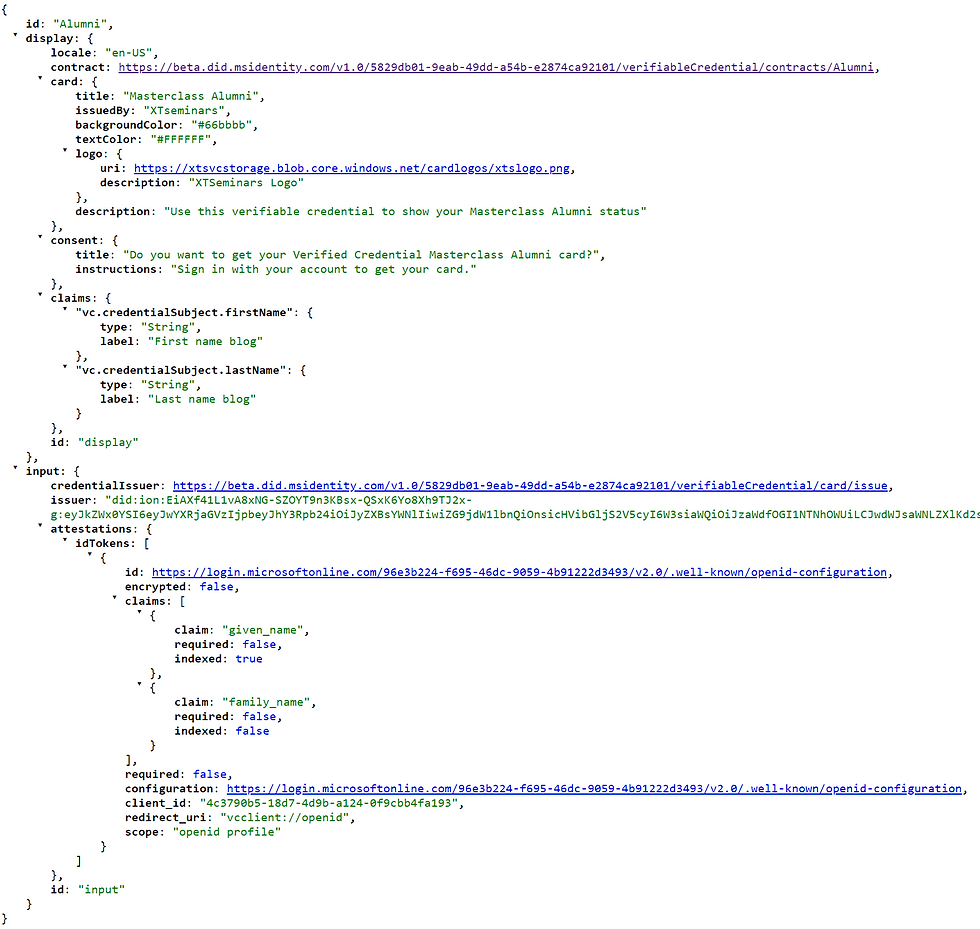
You can see the display characteristic of the card, including the text, logo and background colour. The claims in the display section are the names used in the Authenticator UI. The Input section declares that the attestations are obtained from an IdP. The claims that will be required from the ID Token are also defined. These will be mapped to the VC claims (credentials). The IdP (Azure AD) endpoints and other pertinent data are available through the well-known discovery endpoint (.well-known/openid-configuration).
The issuance request is in JSON Web Token (JWT) format and consists of three components, a header, body and signature. In the following screenshot, the JWT can be seen. Each part of the token is shown in a different colour and separated by a full point (".").

The header identifies the DID of the signer. You can see the DID under the Key Identifier (kid) attribute.
You will see that the request body includes the issuer's (iss) DID, the requested VC type and manifest URL.
If you look at the kid and iss DID values, you will see that they are the same. The #sig_8b553a9e appended to the kid is not part of the DID and is used to identify the public key associated with the signing key. As the DIDs are the same, the issuer of the request signed the request. The DID belongs to the Azure AD Verifiable Credential service, and you see how to set this up in my next blog.
So that you can follow along, the issuer DID is reproduced below:
did:ion:EiAXf41L1vA8xNG-SZOYT9n3KBsx-QSxK6Yo8Xh9TJ2x-g:eyJkZWx0YSI6eyJwYXRjaGVzIjpbeyJhY3Rpb24iOiJyZXBsYWNlIiwiZG9jdW1lbnQiOnsicHVibGljS2V5cyI6W3siaWQiOiJzaWdfOGI1NTNhOWUiLCJwdWJsaWNLZXlKd2siOnsiY3J2Ijoic2VjcDI1NmsxIiwia3R5IjoiRUMiLCJ4IjoiODhVWm9mN0tfMUhlVzhSYzhsekVhSThVWTdZaFRrRFo1QU8zTGNaeElWcyIsInkiOiJwdTJxVkxreFVQMU1aQ0VscWd2Y2VGNGtiMjl5Tm5USm5xbXR0QUd3NmRVIn0sInB1cnBvc2VzIjpbImF1dGhlbnRpY2F0aW9uIiwiYXNzZXJ0aW9uTWV0aG9kIl0sInR5cGUiOiJFY2RzYVNlY3AyNTZrMVZlcmlmaWNhdGlvbktleTIwMTkifV0sInNlcnZpY2VzIjpbeyJpZCI6ImxpbmtlZGRvbWFpbnMiLCJzZXJ2aWNlRW5kcG9pbnQiOnsib3JpZ2lucyI6WyJodHRwczovL21hc3RlcmNsYXNzLnh0c2h1Yi5jb20vIl19LCJ0eXBlIjoiTGlua2VkRG9tYWlucyJ9XX19XSwidXBkYXRlQ29tbWl0bWVudCI6IkVpREtHNW9yaE5ZWGEwbGxpZEZ2ZVQzbU9CQ0p4N0x4TGpYbXhieWlMVDJrNmcifSwic3VmZml4RGF0YSI6eyJkZWx0YUhhc2giOiJFaUNwV1k1N3ZFbHdHQnZISTExZXpzaXI2MEYwNFk0THNld2tXeno5QkN5SEdBIiwicmVjb3ZlcnlDb21taXRtZW50IjoiRWlBVjdERzlRTU9uYjRDU3RCdFRyeGhTSlB4dXY0VVoyUEcxRVRGNld4SWhsUSJ9fQ
Copy the full DID (include did:ion:), and go to https://identity.foundation/ion/explorer/. Paste the DID into the search field. Click search, and it will show you that it is a published DID on ION.

Click Linked Domain, and you will see that the DID is linked to the https://masterclass.xtshub.com/. This domain is reported as verified by the Authenticator. If you want to retrieve the document that shows the linked DIDs go to https://masterclass.xtshub.com /.well-known/did-configuration.json
A callback informs the app that the QR code has been scanned when the Authenticator retrieves the issuance request. It is now down to the Authenticator to complete the issuance cycle. On completion, the Authenticator informs the service, and a callback informs the apps.
Going deeper…
My background is in engineering, and I like to understand what's going on under the hood. This knowledge helps me make informed decisions as an Identity Architect. I set up Fiddler as a remote proxy and proxied all my phone's traffic through Fiddler. In this way, I could capture all of the interactions between the Authenticator app, the Azure AD VC service and more…
In this section, I will report the results of my Fiddler tracing. I will not go into all the detail, but I will give you the big picture and point out the salient interactions. Set up a Fiddler proxy and start investigating if you want a complete trace.
As previously discussed, the Authenticator retrieves the issuance request.

I am not showing the return flows when a request is made for a specific item. For example, Get issuance requests assumes it is returned, hence, the double-headed arrow.
After the request is retrieved, there is no further interaction with the user's browser or the example app until the Authenticator has completed the cycle and has the new VC. Once completed, the Authenticator calls the service and using the callback, the app is notified
The issuance request includes the long-form DID. The Authenticator contacts the DID resolver service and gets back the DID document. It can now verify the signature and check the DNS binding, which confirms the DID belongs to a specific DNS domain.

If it cannot validate the DNS binding, you will see a warning that the app or website may be risky.

The next step is for the Authenticator is to request the manifest details from the Issuer service in Azure AD. As previously discussed, the manifest specifies how the card should be displayed, the required credentials and the method for obtaining the credentials. In this example, the input method is via an ID Token obtained by the user signing into an Azure AD tenant.

The manifest details are returned as part of a signed JWT. The issuer, identified in the token, is the Azure AD VC service, and the service signs the JWT. As before, the signing DID is resolved, and the DNS bindings validated. I have left these the detail off the last flow diagram for simplicity.
The IdP configuration document is obtained from the …/.well-known/openid-configuration endpoint on the Azure AD tenant. The Authenticator then uses an Authorization Code Flow with PKCE to get an ID Token. During this process, the user will be required to sign in. On my diagram, I have simply shown the flow as "Get IDToken". If you want to understand all details of the flows, including PKCE, please come to my identity masterclass. https://learn.xtseminars.co.uk.
The next step is for the Authenticator to send the ID Token to the Azure AD VC service. The service uses the claims in the ID Token to create the required verifiable credentials and return the VCs to the Authenticator.
When the Authenticator sends the ID Token to the VC service, it wraps it in a self-issued ID Token.

The previous figure shows the pertinent information. The Authenticator generates a new DID for the subject (user). The DID is added to the self-issued token, the audience (aud) identifies the token is for the VC Service, the contract defines the type of VC to be created, and the attestations claim includes the ID Token retrieved from the Azure AD IdP. The VC service can now generate a VC based on the information in the presented token.
The newly minted VC is returned as a JWT to the Authenticator:

Once again, I have simplified the diagram and just included the pertinent details. You will see that the Authenticator now holds a signed VC, including the subject DID and the appropriate credentials.

We now have two trio members, Issuer and Holder, but how does a verifier operate? Read on.
Verifying the credential

Click on Verify Credentials, and a QR code is shown. The Microsoft Authenticator app is used to scan the QR code. This app has similar behaviour to the issuing app. When you click the Verify Credential button, an API call is made asking for a presentation request to be generated. The link is passed back to the application, and the browser generates and displays the QR code.
The presentation request defines the VC/credentials that are required by the verifier.
You can see the requested VC in the Authenticator. Once you have presented the VC (Allow), you can click on the card and examine the card activity.

If you examine the presentation request, you will see that it asks for the presentation of a VC with a URI of Alumni and the manifest URL is declared. The manifest URL allows the Authenticator to try and get the requested VC if it doesn't already hold it.
Examine the Presentation response, and you will see it is a self-issued ID Token, but it gets pretty complicated. The ID Token contains a JWT, which has the presentation in it. The Presentation JWT contains JWTs for any VCs that are being presented. A single VC is requested in our example, but it is possible to ask for multiple VCs to be included.

The following diagram shows more detail. Once again, I am only showing the pertinent attributes.

Just by looking at the presentation asserted by the Authenticator, you can see that there are a lot of signatures and DIDs to be checked, and then there will be the requirement to extract the pertinent claims. With the previous Microsoft SDK, the Authenticator returned the presentation to the sample app, and the app was responsible for all the computation needed.
Using the Request service API, the Authenticator sends the presentation to the Verifiable Credentials service API, and the API does all the hard work. Once the presentation has been successfully verified, the app is informed via a callback.
Going deep again
To complete this part of the story, I will show the key components of the flow as captured using Fiddler.

The first part of the flow is almost identical to the issuance flow except for building a presentation request. The next part of the flow validates the signature of the verifier and the DNS binding. In the diagram, you will see how the Authenticator submits the presentation to the Request Service API, which then returns the results to the sample app via the callback.

Nearly the end…
If you have got this far, well done. In my next blog, I will show you how to get the Microsoft sample app running, and you will be issuing VCs using your own tenant's Azure AD Verifiable Credentials Service.
When technology is brand new, and there are endless possibilities for its utilization, I think we become fully empowered to push boundaries and become genuinely creative if we understand how things work. I hope this blog has helped your understanding of DIDs & VCs and the Microsoft services.
Please let your friends and colleagues know about the blog via LinkedIn and Twitter, don't forget to include me, so I see it! @john_craddock www.linkedin.com/in/johnxts
My next identity masterclasses are coming soon, and it would be great to meet with you for a week of identity geekery! Full details at https://learn.xtseminars.com


bos288, slot thailand, bos288, bos288, bos288, bos288, bos288, bos288,
slot gacor, bos288, slot88, bos288, bos288, slot gacor, slot gacor, slot qris,
link slot, raja168, slot gacor, raja168, slot, slot gacor, slot, raja168, raja168,
slot gacor, raja168, raja168, slot deposit dana, raja168, situs toto, situs slot gacor,
raja slot, situs toto, slot deposit qris, slot gacor, slot gacor, raja168, slot, raja168, slot dana,